
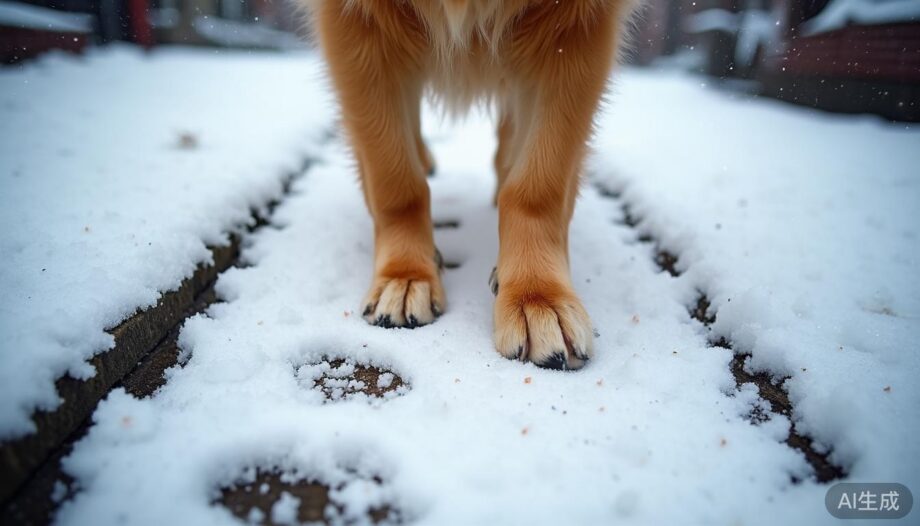
The short answer: winter paw damage is almost always caused by three things — road salt, ice balls between the toes, and cold-dried pads — and a 15-second routine (balm before, warm-water wipe after, quick toe check) prevents about 90% of it. Boots are the strongest protection, but only if your dog will actually keep them on. Here’s what works, what’s overkill, and what a complete winter paw setup really costs (spoiler: under $25).
Why Winter Is Hard on Dog Paws
Dog paw pads are tough — they carry a thick, keratinized outer layer built for rough ground. But winter attacks them from three directions at once:
- Road salt and ice melt draw moisture out of the pad on contact, causing drying, cracking, and chemical irritation. Calcium-chloride-based melts are the worst offenders: they release heat as they dissolve, so a concentrated granule stuck between toes can genuinely burn.
- Ice and snow pack between the toes and harden into painful ice balls, especially on dogs with fluffy feet.
- Cold air does the same thing to pads that it does to your hands: less blood flow to the skin surface, less natural moisture, more cracking once the pad flexes on every step.
The result is the classic winter progression owners describe: dog starts lifting paws mid-walk, then licks paws obsessively at home, then the pads look white, flaky, or split at the edges. None of this happens overnight — which is exactly why a small daily habit beats an expensive emergency vet visit.
The 15-Second Paw Check: Before and After Every Walk
This is the single highest-value habit of winter paw care, and it takes less time than putting your own gloves on.
Before the walk (5 seconds): glance at each pad. Look for existing cracks, redness between the toes, or salt residue from the last outing. If the temperature is below freezing or the sidewalks are salted, rub a thin layer of paw balm onto the pads — it acts as a barrier between the salt and the skin.
After the walk (10 seconds):
- Wipe or rinse each paw with lukewarm water (a damp towel works on light salt exposure) to remove salt and ice-melt residue before your dog licks it off.
- Spread the toes and check for ice balls, salt granules, or grit packed between the pads.
- Dry the paws, then apply a small amount of balm again — this time as a moisturizer for the cold-stressed pads.
If your dog is limping, chewing at one paw, or the pads have deep cracks that look raw or bleed, skip the home routine and see your vet — cracked pads can get infected fast in winter’s wet-and-dirty cycle.
Road Salt: The #1 Winter Paw Hazard Nobody Warns You About
Sidewalk salt is so normalized that most owners never connect it to their dog’s winter paw problems. But it’s worth understanding what’s actually on the pavement:
- Sodium chloride (rock salt) — the cheapest and most common. Effective down to roughly 15–20°F (-6 to -7°C). It dries and irritates pads, and it’s mildly toxic if licked off in quantity.
- Calcium chloride and magnesium chloride — pricier melts that work at lower temperatures. These are hygroscopic (they actively pull moisture) and calcium chloride releases heat as it dissolves — great for melting ice, bad for the skin between your dog’s toes.
- Sand or “pet-safe” ice melts (usually urea-based) — far gentler on paws, but only used on some properties. You can’t count on your neighbors choosing them.
The practical takeaway: you can’t control what’s on the sidewalk, so you protect on your side — balm barrier before, rinse after. Also note where salt tends to collect: building entrances, driveway edges, and anywhere snow has been shoveled into a pile that then melts and re-freezes as brine.
Paw Balm Before, Warm Water After: The Routine That Actually Works
A paw balm doesn’t need to be fancy. What matters is the formula type: you want waxes and butters (beeswax, shea butter, plant oils) that sit on the surface as a barrier and lock in moisture — not a watery lotion that soaks in and disappears.
The routine, one more time, because it’s the core of this whole article:
- Before the walk: thin layer on each pad and between the toes. Think “lip balm,” not “hand cream” — a visible but not goopy coat.
- Walk.
- After the walk: lukewarm-water wipe or rinse, toe check, towel dry.
- Second thin layer of balm on clean, dry pads.
Most dogs need this twice a day in deep winter (morning and evening walks). If you skip the rinse and only use balm, you risk sealing the salt against the skin — the order matters.
You don’t need to spend much, either. A basic grooming-grade balm like our Dog Paw Balm ($7.33) covers a full winter of twice-daily use for a medium dog — cheaper than a single bag of “pet-safe” ice melt for your own driveway.
Dog Boots: When They’re Worth It (and When They’re Not)
Boots are the most complete protection — nothing touches the pad at all. They genuinely earn their price in three situations:
- Heavy salting zones: city sidewalks, apartment complexes, retail plazas where management salts aggressively.
- Long walks or hikes: more time on snow and ice means more exposure, and boots also protect against hidden ice shards and frozen crust.
- Dogs with existing cracks or injuries: a boot keeps a healing pad clean better than any balm.
When boots are not worth the fight: quick 5-minute potty breaks in a yard or quiet street, dogs that flatly refuse to walk in them after a fair training attempt, and calm winter conditions above freezing with no salt. Don’t force it — balm plus rinse covers these cases fine.
Sizing matters more than brand. Measure the paw width with your dog standing (weight flattens the paw, so don’t measure a lifted foot), trace the widest paw — usually a front paw — and compare to the size chart, choosing up if between sizes. A boot that’s too tight restricts circulation (counterproductive in cold), and one that’s too loose twists and comes off within a block.
For budget protection, our 4-Piece Waterproof Dog Shoes ($6.43) are the cheapest complete barrier we carry, while the Anti-Slip Paw Protector Boots (4 pcs, $12.98) add a grippier sole for icy pavement — still less than a movie ticket for a full set of four.
What’s Normal vs. What Needs Attention
Winter pads change color and texture a bit — that’s expected. Here’s the honest triage:
- Normal: slightly dry-looking pads, mild flaking, occasional paw lifting in fresh snow, brief licking after a cold walk.
- Watch closely: persistent licking of the same paw, small visible cracks on the pad surface, redness between toes, reluctance to walk on salted stretches but fine on clean snow.
- Vet time: limping that persists after the walk, cracks that are deep, raw or bleeding, bleeding between the toes, swelling, or any discharge. Also call if your dog vomits or seems lethargic after eating snow near treated pavement — significant ice-melt ingestion is a real toxicity risk.
Two prevention extras worth mentioning: trim the fur between the pads on fluffy-footed dogs (ice balls form around long toe fur), and keep winter indoor humidity reasonable — radiator-dry apartments dry out skin and pads from the inside.
The Complete Winter Paw Kit, Priced Out
Here’s the full setup for a medium dog, using our own store’s prices:
- Paw balm (twice daily, all winter): $7.33
- Waterproof boots for salted routes: $6.43
- Upgrade option — anti-soled boots for ice: $12.98
- An old towel by the door and a lukewarm-water spray bottle: $0
That’s $13.76 for the balm-plus-basic-boots combo, or $20.61 with the upgraded boots — cheaper than a single urgent-care visit for one infected crack, and cheaper than most dogs’ November toy budget. One last habit: walk a little later in the morning where you can. Overnight-salted sidewalks get partially rinsed by mid-morning foot traffic and melt, meaning less salt per step for your dog.
Winter Paw Care FAQ
Can I just use Vaseline on my dog’s paws?
It’s not dangerous in small amounts, but it’s a mediocre choice: petroleum jelly sits on the surface without nourishing the pad, and it collects dirt and grit on a walk. A wax-and-butter paw balm gives a comparable barrier while actually moisturizing, and it’s formulated to be safe if licked off in trace amounts.
My dog refuses to walk in boots. What now?
Train it, don’t force it: put the boots on indoors for 5–10 minutes a day with treats and play, before ever going outside. Most dogs accept boots within a week or two of this. If yours genuinely won’t, balm-before and rinse-after plus trimmed toe fur will cover routine walks — save boots as a non-negotiable only for injuries or extreme salting.
Is sidewalk salt actually dangerous if my dog licks it off their paws?
Trace licking causes the GI upset you’d expect (drooling, maybe soft stool). The real danger is a dog eating granules or drinking from salty slush puddles in quantity — that can cause vomiting, lethargy, and in severe cases electrolyte problems. Rinse paws after walks, and steer away from melt puddles at building entrances.
Do northern breeds like Huskies need paw protection too?
Less than short-coated dogs, but not zero. Dense toe fur is cold-adapted, yet that same fur is where ice balls form, and salt burns a Husky’s pads the same way it burns any dog’s. Balm and the toe check still apply; boots become optional rather than recommended.